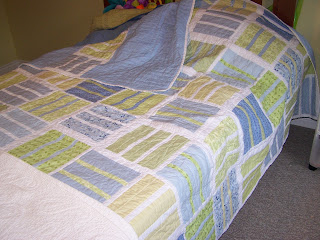
Sunday, November 18, 2012

Welcome to my new Gluten Free life!

Wow.  Well, things change and people must change to adapt. There is a high probability that my dizziness and disequilibrium issues are caused by vitamin deficiencies which in turn are caused by malabsorption in the intestines due to the intolerance of wheat and gluten.  That sounds really medical doesn't it?  What I don't want you to think is that gluten causes dizziness.  It may have, but in an indirect way.  Removing gluten from my diet only fixes part of the problem.  We still have to deal with the vitamin deficiencies.
So I've been gluten free now for 13 days!  Has it been hard?  No, not really.  Remember, I have been dairy free for several years, so I already read labels, and I already make most of my food from scratch.  I have spent some time thinking through our daily meals and choosing things that we normally eat that don't have gluten at all.  We've had some great kabobs with roasted veggies, stews, Mexican dishes, stir fry with rice.  There seems to be an endless supply of meals that don't involve gluten, and we haven't even delved into the "gluten free" replacements all that much.  (I have tried some breakfast cereal, but don't really like them).  
The hardest part of gluten free in my world is the lack of cake.  
I did buy a gluten free cake mix.  I think it was $12, and it makes one 9 inch round cake.  I'm not sure I'd get more than 9 cupcakes out of that. I haven't tried it yet, it is in my "emergency" supply kit, for those dark desperate days.  What I did find though, is an amazing gluten free dairy free dessert that I had been introduced to many years ago when we lived in Texas.  There was a family there from Australia, and this was a "typical" Australian dessert.  My recipe just happens to involve chocolate!

Chocolate Pavlova (yes, like the drooling dogs....  aptly named)

6 egg whites, room temperature
1/4 tsp salt
1/4 tsp cream of tartar
1 1/2 cups granulated sugar
2 tsp corn starch
3 tbsp cocoa powder
1 tbsp vinegar

Preheat oven to 275F
Line a cookie sheet or baking pan with parchment paper

In stand mixer, whip egg whites with salt and cream of tartar until soft peaks form.  Gradually add sugar a few tablespoons at a time, until addition is complete, meringue is glossy and peaks are STIFF.
Gently fold in sifted corn starch and cocoa powder, and vinegar, being careful to not deflate the meringue.
Pile onto parchment paper, approx 9 inches in diameter. It will spread when baking to about a 11 or 12 inch cake.

Bake in center of oven for approx 1 hour 10 minutes.  Pavlova should appear crispy and dry on edges, but remain soft and fluffy on the inside.  Turn off oven, and open the oven door slightly.  Cool in oven 30-60 minutes, then remove from parchment (carefully!) and place on serving plate.  Cool completely.

Serve with coconut whipped cream and berries on top.

To make coconut whipped cream, refrigerate can of coconut milk (high fat).  Separate cream from water.  Whip the cream gently with a whisk.  

If pavlova is prepared with cream and berries on top, it needs to be eaten immediately.  If kept separate, cover and refrigerate maximum overnight.  This is not a dessert you should make ahead of time.  It should be served on the day it is made.

Pavlova is now baked.  The oven door is open to let it cool gently.  
served with coconut whipped cream and raspberries


more pictures to come....

Monday, September 24, 2012

Frankencake- Where Pinterest goes Wrong

Don't you just love Pinterest?  All those great looking pictures for all those great tasting recipes?  Maybe Pinterest is just about looking at pictures.  I know that's what some people do, they spend hours upon hours just looking.  And drooling. I'm sure they drool. How can they not?
When Pinterest first became popular among my friends, I vowed to do more with it than just waste time.  After all, I was wasting so much time doing other useless things, I would need to be more effective in my time management skills to have more time to waste.  So I decided to actually MAKE the things I pinned on Pinterest.  It has been so lovely.  I've taken up quilting, and have baked and cooked some lovely meals.  It seemed like a dream come true.  Pinterest was making me better.
But then, everybody started pinning.  There were so many pins to choose from, its hard not to pin the same thing twice!  And now...  it appears that not all the recipes are as good as they look!  I've even seen some pins with little flags that say "Pinstrosity"!  A new word made up for these awful, miserable recipe failures. In fact, there's a whole website dedicated to these failures (see here) Well, I've had a few that were not as delicious as I would have expected, but I have to tell you about my friend Cracker, and her fantastic FRANKENCAKE!

Cracker's son (We'll call him Crumb) had a birthday.  He requested a cake based on a beautiful picture he found on Pinterest.  Cracker read through the recipe and thought to herself: is that a typo?  could there really be 1 1/2 cups of oil in a cake?  and 5 eggs?  and jello???  After a phone conversation, and consulting the not so good reviews of this recipe, Cracker doubled the recipe, except for the oil and egg.  Within a few hours, this is what I saw on Facebook:  

Today's life lesson: If a recipe looks like a disaster, walks like a disaster, and quacks like a disaster, then it IS a disaster. Worst thing I've ever baked!

I'm not sure what a disaster quacks like, but I needed to know more...  so another phone conversation to find out that the cake flopped out of the pans into the bottom of the oven during cooking, was flat in the middle, wouldn't come out of the pan, and tasted very oily, I asked her if she wanted a different recipe... maybe for something different.  But it was late, so she decided to save the cake, frost it, and present it like it were a masterpiece at the birthday dinner.  

Here's her pictures:

Figuring Gas-X might be the perfect after cake treat?

Happy Birthday Crumb! Hope you enjoy your 10 pound Frankencake (and the gas-x)

What a beautiful picture.  The cake is so perfect, green, and crooked.  
Are you curious as to which recipe this is?  This my friends, is Tricia Yearwood's Key Lime Cake.  You can find the recipe here.  Poor Heidi, if she does really bake, did you make this cake?  I also found the recipe on Food Network's site, and the comments there were quite poor too.  
You should know that Crumb politely claimed that the cake was "really good", and that other family members ate it up (some requesting seconds).  Sadly, I live too far away from Cracker and her family to have the opportunity to taste the Frankencake.  I can't tell you how sad I am.  Almost sad enough to buy the ingredients to make it flop in my oven...  but not quite.

Remember when I first started blogging, I said I'd love to be on Pinterest?  Well, not so much anymore.  I can tell you one thing. I will not be making any cakes that call for 1 1/2 cups of oil or jello.  Unless I've gone mad.  That could happen.

Saturday, September 22, 2012

Tastes like Chicken! (crispy baked fish)

Fish isn't something we have at our house.  I love it, but it seems nobody else does.  Last week something changed.  Muffin went to a friend's house for dinner and she ate fish!  She came home and said:  Fish is good! It tastes like chicken!  She wasn't impressed when I told her that she used to eat fish sticks as a child, because I said it was chicken....  
While grocery shopping today, I wasn't going to let this pass. I picked up a big pack of wild haddock from Costco, while Sweetie says:  Muffin ate fish once, so you're making it for her again? YES.  That's the plan.  And I'm going to make it taste like chicken.

Crispy baked fish

3 haddock fillets
1/2 cup mayonnaise
1/4 cup lemon juice
pepper
salt
cornflake crumbs
dried herbs (consider taragon, parsley, thyme)

Preheat the oven to 425F

Whisk mayo and lemon juice together, add pepper.  (I love fresh cracked pepper, so I used lots)
Cut the fillets into portion size pieces.  season lightly with salt.
Mix cornflake crumbs and herbs on a plate
Dip fish into mayo mixture, then into crumbs to coat.  Place on foil lined baking sheet, or on baking stone.  Bake at 425 15-20 minutes depending on how thick the fillets are.  They should easily flake with a fork.  

Enjoy!


Sunday, September 16, 2012

Pancakes for breakfast!

I really like pancakes.  But pancakes aren't easy anymore.  I remember the days when I could grab a bowl, a scoop of pancake mix, water and then the frypan and I was eating in no time.  And pancakes were foolproof.  That's what mixes are all about, right?  Well, after many days of complaining after breakfast, Cookie pointed out to me that the bag had something else written on it:  BUTTERMILK pancakes.  And in one of her classic "face that says it all" looks, she said; "so do ya think there's dairy in this mom???"  ACK!  why had I never read the bag before??  Its not like the bag from Costco was a small bag....
So today, I was craving pancakes for breakfast.  Actually, I've been craving maple syrup, of which we now have a large supply again.  Pancakes were my chosen vessel upon which to eat maple syrup, only because we have no bread for French Toast.  Looking at my breakfast board on Pinterest, I found this recipe, and thought I'd try it out.  I didn't print it off though, because the printer is out of paper, and loading paper would require a trip to the paper storage shelf in the basement, clearing clutter on the desk to get to the printer, loading the paper and then ensuring that I'm only printing the recipe, not the entire blog.  Too much effort.  Especially when my kitchen is just outside my office and I can come back and look at the screen, right?
Well, surprisingly, after a few mistakes in reading the recipe, my pancakes were deliciously fluffy and light!  Muffin thought so too.  

So here's my version:

In a mixing bowl add:
2 cups flour
3 TBSP sugar
3 TBSP baking powder
1 tsp salt

In a large measuring cup add:
1 1/2 cups milk ( I used So Delicious Coconut Milk Beverage)
3 eggs
1 TBSP vanilla

Whisk this all together, then add to the flour mixture.  Mix with a spoon until smooth.


Heat oil in stainless steel skillet until piping hot.  Gently drop pancake batter into pan making 3 inch pancakes. Reduce flame to medium under the skillet so the pancakes don't burn or brown too fast.  When the edges are golden and the top of your pancake is full of bubbles, gently flip them over. [The batter in the bowl will become fluffy and full of air.  Don't stir it to get rid of this air.  Leave it, and gently put it into the pan so that this leavening is somewhat conserved.  It will help make your pancakes super light and fluffy!] 

Serve with maple syrup and enjoy!

OOPS!!  I didn't take any pictures!!  I'll have to make some more this week and edit the blog!

Thursday, August 9, 2012

What a busy few weeks!

Wow.  I can't believe summer is almost done!  It seems that since Cookie came home from Hawaii that time has been flying.  I have made many layer cakes and a few meals here and there, but I've been too busy eating them to take any pictures or blog about them!  Hopefully, that will change in a few weeks.  Last week, Cookie's boyfriend came for a visit, and this week has been appointments and cleaning, in preparation for a party on Saturday.  And next week, well, I'll be off to Iceland and England on an epic adventure known as my little sister's wedding.  Can't wait.  Maybe there will be pictures...  I think I need a more portable camera.

I promise to be back soon.  I'll be getting my quilt back out, and cooking and baking too! 

Saturday, July 21, 2012

Happy Birthday!!!

Big birthday preparations and fun today.  Celebrating 19 years of having Cookie in our family!  What a treat!
In honour of this occasion, Muffin and I worked hard to create the perfect birthday cake!
We used this cake recipe, but changed out the milk for So Delicious Coconut Milk beverage, and the butter for Earth Balance.  Oh, and we made it lemon flavoured!! 
We made 2 round cakes first.  Then we made 24 cupcakes using the recipe posted here.  These are vanilla flavoured, just in case we get tired of eating lemon cake.
Cookie sent tagged us in Pinterest, so we could see this cake idea...  but she wanted a SHARK!!  Cookie loves sharks...
It was hard, but in the end, Muffin was the hero!  This is what we got:
Its a great white...  lemon shark!!

He has TEETH!!


With the extra round cake, Muffin made this!  So beautiful!


Of course, we sang Happy Birthday to Cookie in our best voices after dinner, and we cut the cake.  We cut the rosette cake, keeping the shark intact a little longer.  Pretty sure I'll be having shark for breakfast tomorrow...  

***NO SHARKS WERE HARMED OR WILL BE HARMED****

Oh, and please, support shark conservation efforts on behalf of Cookie, marine biology student/shark lover.


Monday, July 16, 2012

And the winner is......

Canadacole is the winner of the name the quilt contest!!  But let me tell you how this all played out...

As I posted a link on Facebook, that's where the names started coming... first name was Fields of Love, given by a dear friend who explained how the quilt reminded her of the perfect fields when flying over England.  I was drawn into her vision and thought so too. It reminded me of my trip to England a few years ago when I toured London and the surrounding areas with my sister on a weekend!  I began to think that the quilt reminded me of the perfectly manicured gardens at Hampton Court.  I was hoping someone might name it "my english garden", but that never came.
The next names were amazing too, as each one had a story that went with it.  They were all very touching, but it wasn't until canadacole posted Summer Oasis that I knew I had my quilt name.  (For a brief moment there, I thought Harry might be appropriate given the fact that I have puppy and guest puppy at the house and in my bed most mornings...) As a tribute to the fabric name, Oasis is very appropriate, but even more so with this hot hot weather we're having!  I'm not complaining, because this is the first hot summer in five years of living on the coast!  It's a shame to be so close to the beach and not have hot weather! During this heat wave, I've been in my cool basement- my oasis- working on this lovely quilt!  What a treat!  It will certainly bring hot summer memories once I have it completed.

Now, Canadacole lives a bit too far for me to just bake something and bring it over, so I offered the set of handmade cards.  Wanna see them?  They are quite pretty.... I hope she thinks so too!


Fancy little storage box to hold them all!!

Today is the day Cookie comes home from Hawaii for her summer break!  Can't wait to see her! I'm baking a triple layer cake for her!
I want to eat it now!!  Only 2 more hours before she arrives!

Wednesday, July 11, 2012

Mango Coconut Sorbet, for a hot hot day!!

Company is coming today!!  I thought I'd plan dessert and then later I'll figure out what we're actually going to eat.  I want it to be delicious, maybe even a little decadent?  Well, lets start with dessert- decadent and dairy free!!
I've made coconut milk sorbets before.  There was an awesome recipe on canadianliving.com a while back. In fact, I remember making it in Galveston in 2006 while on a family vacation in January...  and I know we had it before then, because I remember that it was a tried and true recipe that I brought with me (along with my icecream maker in my suitcase!!) for family night in our condo.  So my coconut milk sorbet from before was a simple syrup made with lime juice and lime zest, added to coconut milk in the ice cream maker.  So, same technique here, except that I want it to have a lot of mango purée in there too.
One 600g bag of frozen mango into the food processor.  A little hard to purée because it was frozen.  No problem, the next step will fix that.  We still need a simple syrup:  1/2 cup pulp free orange juice, 1/2 cup sugar, in a saucepan on the stove.  Bring to a boil, completely dissolving sugar and reducing slightly.

Now we have a smooth mango purée! 
Add the coconut milk and blend...  and into the ice cream maker!  
Oh wait, maybe you should read the instructions on the icecream maker that you haven't used in a few years to remember how to use it!!  Or, you could just dump everything in and then not be able to put the paddle attachment in...  and not be able to dump it out because it is already frozen to the edges, so you end up having to paddle the whole thing by hand!!
Starting to chunk up.  Thank goodness I had this hard plastic spatula in my drawer. I think it came with a hand mixer...  lovely tool.  Scrape and stir, scrape and stir....  my arm hurts.

I poured it into a lovely ceramic bowl once it reached the hardest consistency I could paddle, and into the freezer it goes!  Dessert is going to be awesome!
Does this look creamy enough?  It was so good! 


There's only 2 days left to name the quilt!!  Get your creative caps on!!

Saturday, July 7, 2012

Do not press....

I have some pictures to show you.  Maybe this will help you with the quilt name you're going to come up with, but that's not why I'm going to show you the pictures.
Remember I said I was trying out this new technique (well, new to me...)?  Well, let me show you the preliminary results of my experiment in this no- iron technique.
What do you think?

Sweetie says it looks even better now with the white strips in between.  I like it a lot. 

You will notice here the slightest unevenness in the ends.  Less than 1/4 inch in all rows.  I'll trim this up at the end.  Don't you just love my photography skills too?  Yes, that is the camera strap.  Yes, those are my feet.  If only you could get a closer look at the fireworks design I have on my toes.  Muffin is doing nails these days...

No trimming done here.  This is the end I have been starting at to sew the strips.
What you should be noticing is how nicely my lines and rows match up. Now, I could take great care to make this happen, with trimming and pinning and a bunch of other tricks that I haven't learned (hence my usual results), but I haven't taken much care at all.  Well, except for the fact that I carefully cut to exact measure each piece before I started, and I carefully sewed each piece using an exact 1/4 inch seam, and I did not press any fabrics after the initial cutting!  The results are astounding to me!  I have always wondered why the math didn't work out. I would calculate, taking into account seam allowances, and the math wouldn't work out to what reality was.  Or perhaps it was the other way around.  Math is ALWAYS right.  Reality may vary???  Well, I think the trouble with the math was that I could not account for the distortion caused by ironing.  
[Interesting thought here- could it be that the reason my clothes don't fit right has NOTHING to do with the coconut cream strawberry desserts and a whole lot to do with the fact that I iron them???  Maybe I should just wear my clothes wrinkled....  ]

So now that you've seen these pictures, are you thinking of a name?  You still have 6 days!!  There are names posted on my facebook wall post too.  Click here to find it.  I'll be choosing from both places.   I hope to have the quilt top finished before Cookie comes home from Hawaii next week!

Thursday, July 5, 2012

Giveaway!!

I've been continuing to work on the new quilt and realize it needs a name!!  So I thought, maybe I'll leave it up to you for suggestions?  The pattern is called  Rectangles and Strips.  The links to the original can be found in the previous post.  The fabric is Oasis by 3 Sisters for Moda.  Post your suggestion in the comments, and the best one will get:  a collection of hand made cards OR a baked dessert (if you live locally or want to travel to my house to pick it up!!)  I'll pick my favourite on Friday July 13th (will that be your lucky day???)  That gives you a little more than a week to come up with a creative quilt name!!
the unnamed quilt, layed out on the family room floor!
I have all the pieces cut, and all the strips made.  I need to make 1 1/2 inch white strips to separate each of the rows.  This quilt is going to be HUGE!!  I'm thinking a King size!  That will come in handy because I seriously think we need to get a King size bed.  Puppy is starting to take more room than he should, as he is stretching out, and Sweetie has grown accustomed to bigger beds after his 3 week stay in a luxury resort in Barbados (it was work...  yeah, we all wish we had his job!!)  I'm finding myself curled up on my pillow, or clinging to the edge of the mattress most nights.  Lately, I've given up and gone to cuddle up to the Vanilla Cake quilt in Cookie's room (aka the SPARE room).  

I hope to get some strips cut tonight, and maybe start sewing it up!  We have a guest puppy coming to Camp Kirchner for 2 weeks though, starting tonight. That might impede production.  Maybe I'll have to go back to baking and cooking while the guest puppy is here.  I need to pick this up and put it somewhere until I can piece it together, because I am still not ironing.  I have to wait until the quilt top is complete... remember, I'm trying out this new technique!  So far, I like it!

Can't wait to read your quilt names!!

Wednesday, June 27, 2012

Today is the day!

I've been waiting patiently for 5 weeks now for the vertigo to go away.  Every day I hope that "today is the day"...  but it isn't.  I've come very close, only to relapse and feel worse again.  Well, today is the day I finally get to see a neurologist.  
In the meantime, Sweetie came home from Barbados, and I started a new quilt!!  Yes.  I'm not sure what I'm going to call this one yet.  It is a rectangle and strip quilt.  I got the idea for it here.  But the actual quilt maker's blog is here.  She designed the quilt for a quilting magazine, and it can be found online here.  The only problem is the quilt size!  Why do people make all these small quilts?  I don't understand.  I want quilts that fit on beds.  So I've done the math...  you know how dangerous that can be!!  And I think I can do it with my bundle of Fat Quarters that I got on sale at Its Sew Time last fall.  I bought the bundle because there was a 40% off sale, and I just couldn't resist. It is a collection of 40 fat quarters from Oasis by 3 Sisters for Moda.  Beautiful.  Only problem is that there is no more.  That's it, only 40 fat quarters.  I've been hesitant to use it because there can be no miscalculations!!  I can't get anymore.  (if you look back at my previous quilts I believe I mention my frequent trips to the fabric store to get more....)  I also don't have any coordinating fabric for the back.  My plan is to do the front and then take it with me to find something that will work for the back.  
I did something else too.  I signed up for another Craftsy.com course!  I enjoyed the machine quilting one, and found it very valuable, so I wasn't hesitant to try another, especially when they offered me a great discount at $20 per course.  So the one I've signed up for is called Re-Piecing the Past.  It is a course to make a civil war era quilt.  But I'm not making the quilt.  I was curious when I read the description of the course about a technique she uses.  The course is taught by Kaye English.  She's a great quilt designer, maker and collector.  She used to have her own quilt shops but now she just teaches quilting around the US.  I believe she's from Kentucky somewhere.  So back to this "technique".  She refuses to iron!  She pieces her entire quilt without ironing or pinning.  Why?  Not because she is lazy, but because she finds the iron distorts her blocks!  I know!!!  So you start out with perfectly (or near perfectly) cut pieces, you carefully sew them using close to perfect 1/4 inch seams and after you iron your blocks they are all different sizes?  This is why my math doesn't work!  Its the iron that is causing my distortion- or so I hope to prove.  I'm going to make this quilt without ironing!  Well, without ironing the blocks until the quilt top is done.  I've ironed all the fat quarters prior to cutting.  And I'll carefully handle them while sewing to see if we can eliminate the distortion of the fabrics.
So far, this is what I've got:
my work space.  Love this portable table!

You can see my math sheet...  and my neat stack of rectangles and strips.

my stack of fat quarters on the floor... 

6 meters of Kona White...  and more jumbo spools of thread... oh, and a new blade for the cutter!

Love this pink print.  Looks vintage

My favourite of all the fat quarters...  getting ready to make the first cut.

So far, 18 of 36 fat quarters are cut.  I have a pile of blues, pinks and creams.  I still have taupe, red and yellow to do...

On a different note.  Today is also the day I age 5 years.  Yep.  Happy Birthday to me x 5.  Apparently there is a mix up with my Social Insurance Number and my birthday.  Today is the day I go get that fixed so that they know how old I really am.  Wish I could change everything to match the wrong date....  On the up side, maybe I can just have cake?  with vanilla frosting and sprinkles?

Monday, June 25, 2012

Bound in White

Finished!!  The Vanilla Frosted Triple Layer Cake Quilt is finished!!

White binding!!  I love it!!

All washed and crinkly... just the way I like my quilts!

Stripe on the back!

White binding on the front side!

So comfortable!  The puppy and I slept in it last night!
When I purchased the fabric, I had bought a medium blue fabric for a contrast binding, but as soon as the quilting was done and I layed it out to trim the excess, I knew that would be a big mistake.  I love the white in the quilt- the Vanilla Frosting!  I like how it helps show the offset of the blocks to lay out the pattern in it.  I felt that a contrast binding would take away from this, and really felt that white was the way to go.  Muffin was with me, and I only had a small piece of white fabric left.  We worked out the math, and I must have done it right because I had enough!!!  I have gone away from using 2 1/2 inch strips for binding, and opt for a more generous 3 inch strip.  Although that really only gives me an extra 1/8th of an inch after the folds, that is EXACTLY the amount that I need in order to be able to machine stitch my binding!  With the narrower strips, I found I had to do it by hand, because by machine I would fall off it so many times....  

So here we have it.  My first Full Size machine quilted quilt!  I love it.  I can't wait to work on the next one... but I have another project I need to finish first.  Hopefully, I'll be writing about that soon!


Wednesday, June 20, 2012

Better than strawberries and cream?

Since I can't have whipping cream, or custard (unless I make it myself), I've been eating just berries.  No more shortcakes, no more trifles.  Boo hoo...  I miss them!  Especially when strawberries come into season.  Not the ones you can buy all year round that are grown in some strawberry factory in the US, but good old fashion strawberries that are picked locally, and only are available at the end of June!  Well, the end of June is here...  so here is my latest blog entry:  BETTER than strawberries and cream.


Are you drooling yet?  Are you asking yourself : "What is that thick white cream she has? How can she do this without using dairy?"  Well, the answer is my favourite dairy substitute:  Coconut Milk.  Yep!

In the bottom a glass bowl (so that you can see the layers, I love this), add sliced strawberries, or any berry, fruit, or berry-fruit combination you would like.  The bottom layer of this one actually has a sliced banana...  its a surprise!  (well, unless you hate banana....)

I added some of the coconut sauce to cover the bottom layer of fruit- mainly because I fear my bananas might brown if I don't do this.  So, here's the coconut sauce recipe:

1 can coconut milk
1/4 cup  powdered sugar.

Mix them together.  Yep.  That's it.

The next layer in this delectable dessert is sliced angel food cake.  Angel food cake is naturally dairy free, and is almost gluten free as it involves very little flour compared to regular cake.  I bought my angel food cake because it is tedious to make and so easy to purchase!  Love the bakery section at SuperStore this time of year....  I could eat angel food cake for breakfast!!  Wait... I did...

On top of the cake, add some more sliced berries, then pour the rest of the delicious coconut sauce overtop.  The coconut sauce will soak into the cake, adding texture and flavour.  I've stored mine in the refrigerator until tonight's function, so that the coconut sauce firms up a bit.  Its going to be DELICIOUS!!  And best yet-  I can eat it!! I can have a bowl or even 2!!!  Yay for Dairy Free Desserts!!!

( I edited this to say powdered sugar instead of just sugar. I did use granulated sugar the first time and it worked out fine, but the powdered sugar dissolves a whole lot faster)